Tuesday, July 26, 2011

Pastry Pockets Filled with Stuff

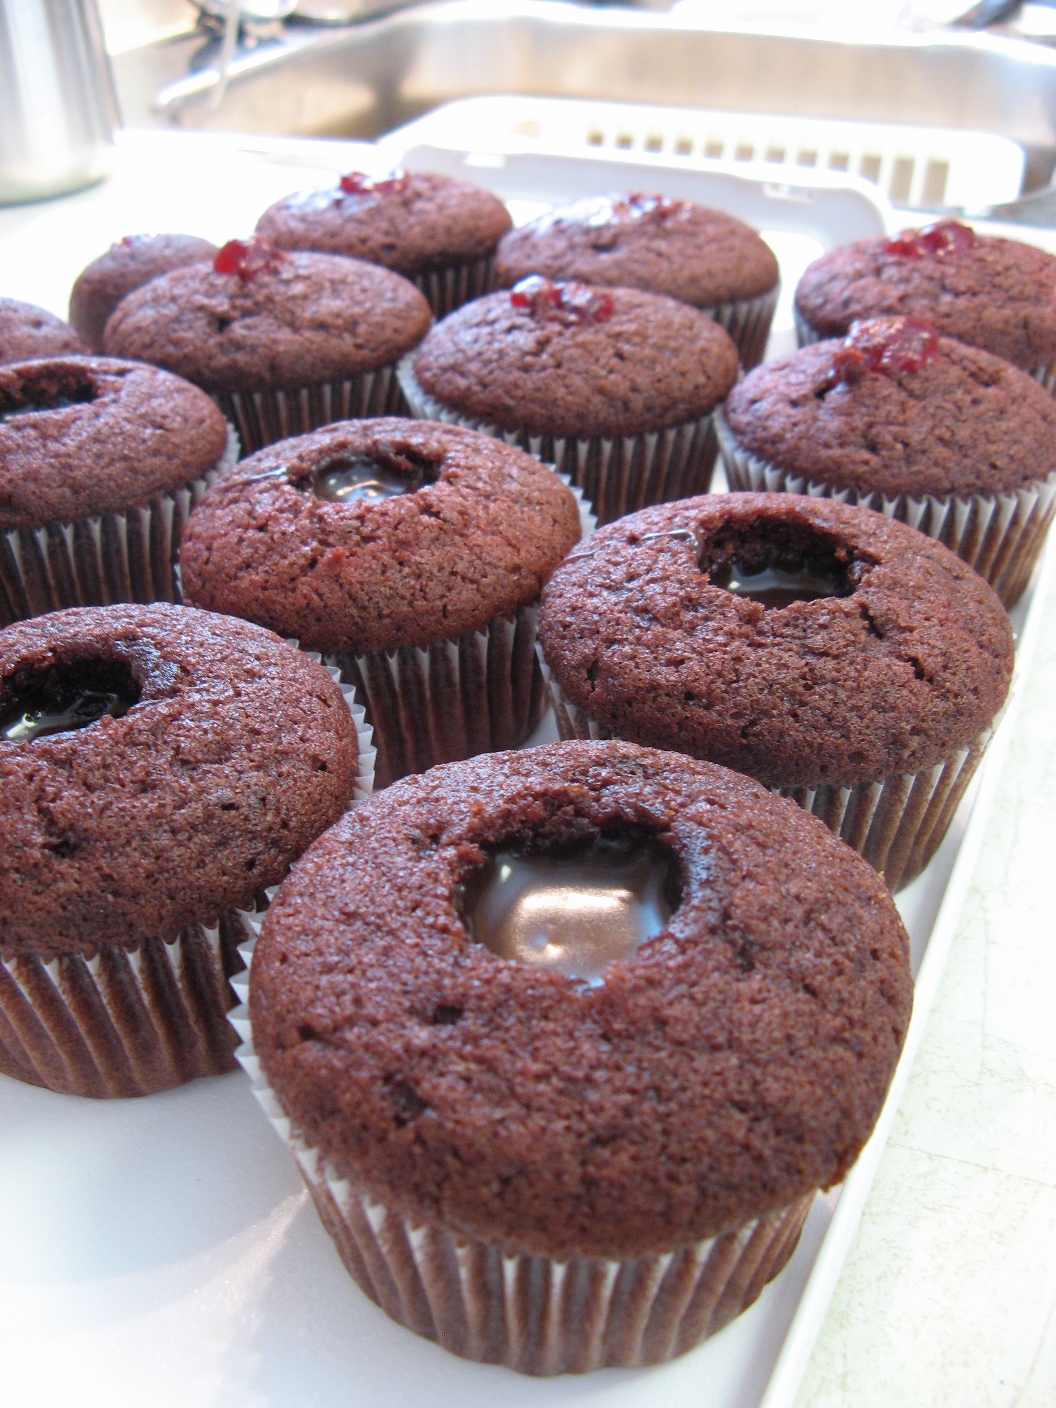
As I mentioned last week, I found this really cool recipe for homemade “Pastry pockets filled with stuff” (Is the word pop tart trademarked? Oh well!) However, due to an unfortunate lack of eggs, I made muffins instead. Well this is a new week, and fortunately I got some groceries!

I came across this recipe on Smitten Kitchen’s blog. I’m not a huge pop tart fan (I only ate them for a brief period in my childhood); however, the pictures made them look divine! After reading through the recipe, it seemed straight forward; though, none of the fillings tickled my fancy. If I weren’t so lazy, I could just go buy jam pop tarts from the grocery store and save myself the trouble. That’s when I got an idea… 
My friends and I love going down to the States to grocery shop; they have a wide selection of food products that we just don’t get up here in the Great White North. One of my friend’s favourite treats to buy is pop tarts. But not just any pop tarts. Oh no! These are chocolate chip cookie dough pop tarts! Raw chocolate chip cookie dough is one of weaknesses, so I decided to try and make my own version. Though, I admit, I made some cinnamon filled ones too – just in case the cookie dough thing didn’t work out.

Wednesday, July 20, 2011

What's on hand?

Like most people, I can be pretty lazy. Unless I absolutely HAVE to bake something specific, if I don't have the ingredients for a recipe I'll make something else! That's what happened this week.

It started off with me trying to find a recipe that used buttermilk (since we bought a large carton of it) and I found a relatively simple muffin recipe, and I love muffins, so win-win. But I wasn't excited about baking them. So I surfed the web, trying to find something that caught my eye and that's when I saw homemade pop tarts. I'm not a big fan of pop tarts, but I thought it would be something people hadn't seen before. So tonight, I started getting all my ingredients out, thrilled to try out this recipe when I realized... I had no eggs.


I know I don't live far from the grocery store, eggs aren't that expensive, and I'm bound to need eggs in the near future - but I figure future me could deal with that problem! So I decided to just go with Plan A and made muffins! (Now, I do admit, the recipe called for an egg as well, but I was more comfortable replacing the egg in this recipe with just egg whites since it wasn't playing that big of a 'binding' role) Now that I've made them, I'm pretty excited! I love trying to make delicious, healthier muffins since they usually get a bad rap. Now, that's not to say these taste like those muffins! They do have a different texture and aren't nearly as sweet, but the explosion of berry inside is wonderful!

Saturday, July 16, 2011

It's worth the allergic reaction

Now Imagine yourself biting into a delicious Reese Peanut Butter Cup, but instead of the crisp chocolate shell there is a soft chocolate, peanut butter-ey cloud? Doesn't that sound dreamy? Well guess what, it can be reality!
 
Before I go on, I must say, I'm elated I don't have a peanut allergy. The first time I had peanut butter, a life long addiction started and for 4 years my breakfast consisted of toast, peanut butter and flax. I loved every minute of it!

I don't know what happened, but recently I've taken a little break from my beloved. My breakfasts have changed and thus my peanut butter consumption has decreased dramatically. As a result we have tons of peanut butter sitting in the cupboard crying out to be loved. Hence the second thing I baked this week - something that required as much peanut butter as possible.

Monday, July 11, 2011

I hope I don’t get fat…

Wow, this is going to be a busy baking week; I’ve decided to bake 3 different treats for various occasions! Don’t get me wrong, I’m going to love every minute of it! I just hope I can restrain myself from tasting at every step - especially the Q&A step before distribution! Otherwise, those new clothes I bought will be going to the back of my closet to taunt me.

I’ll start at the beginning, with the first dessert I baked this week. A friend of mine absolutely loved these cookies I made a couple months ago, and when I told her I started this blog she immediately searched the blog for the recipe. Unfortunately, I hadn’t put it up yet (since I’m only posting recipes as I bake them), so she was disappointed she couldn’t bake the cookies herself. Well, to make it up to her, I baked them this week. So not only will she get the recipe, but some cookies as well!


Tuesday, July 5, 2011

Mmmm.... Bacon!

Really? Is there any better food than bacon? I bet you're thinking no! But guess what? There is!

What if I said... maple bacon truffles? Oh yeah! They're pretty much as awesome as they sound!

As promised in my last post, I spent this evening slaving over... my counter (That doesn't have the same ring to it...) making truffles! But not just any truffles, nope! I made 4 varieties:

  • Triple chocolate truffle: I started off with plain milk chocolate truffles, dipped in dark chocolate and drizzled with a little bit of white chocolate - this one was for the picky chocolate eater in my family.
  • Maple bacon truffle: maple flavoured milk chocolate truffle, dipped in dark chocolate and sprinkled with a bit of crumbled bacon.
  • Berry explosion truffle: milk chocolate truffle with a tiny amount of berry mush in the middle, dipped in dark chocolate - I swear it taste better than it sounds!
  • Coffee truffle: milk chocolate truffle with instant coffee granules mixed in, dipped in dark chocolate and topped with instant coffee. 

Monday, July 4, 2011

Sometimes things do work out

Recently, I have had this desire to make complicated, difficult cupcakes. I don’t know why… I really haven’t been the biggest cupcake person in the past (in terms of baking them – I’ll eat them any day of the week!), but I think ever since I started watching Cupcake Wars I realized the endless possibilities of what you can do with a simple cupcake! And to satisfy my craving for a challenge, I decided to make Raspberry Tiramisu Cupcakes.


Yes. Raspberry. Tiramisu. Cupcakes. Sounds pretty good, eh? (As a side note, after posting my epic frosting fail from Canada Day, I thought I would redeem myself with an example of one time where things went my way!)

I've made tiramisu before and I have to tell you, it wasn't easy. I actually worked up a sweat making it! So I thought a tiramisu cupcake would be a good challenge. I found the recipe from another food blog I started following, Chef Chloe. I saw her compete on Cupcake Wars (is it obvious I’m obsessed with that show?), loved her style of baking and the cupcakes she came up with. Here is the recipe I adapted from her: 

Cupcakes
1 1/2 cup flour
3/4 cup sugar
1 tsp baking soda
1/2 tsp salt
1 cup milk
1/2 cup unsweetened applesauce
2 tsp pure vanilla extract
2 tbsp apple cider vinegar

Soaking Liquid
1 tbsp instant espresso powder in 1/3 cup boiling water

Raspberry Sauce
1 cup raspberries (fresh or frozen)
1/2 cup sugar
1 tsp pure vanilla extract
1 tsp lemon juice
1/8 tsp cinnamon

Frosting
1/2 tbsp instant espresso powder
1 tbsp boiling water
1/2 tbsp pure vanilla extract
1/8  cup butter
2 cups confectioners sugar
2 tbsp water

Procedure:
Cupcakes
  1. Preheat over to 350. Sift or whisk together flour, sugar, and baking soda into a bowl.
  2. In a separate bowl, mix the coconut milk, oil, vanilla, and vinegar. Combine the wet and dry mixtures and whisk until thoroughly mixed.
  3. Distribute batter into lined cupcake baking pan, and bake for 15-20 minutes.
Soaking Liquid
  1. Combine water and espresso powder and set aside.
Raspberry Sauce
  1. In small saucepan, cook raspberries and sugar on medium heat on raspberries wilt down. Let simmer on low for 5 minutes until the mixture becomes a pourable consistency.
  2. Remove pot from heat and mix in vanilla, lemon juice, cinnamon, and salt. Taste and adjust sweetness by adding more sugar if necessary. Let cool in refrigerator.
Frosting
  1. Combine espresso powder, water, and vanilla in small bowl and mix or swirl bowl until espresso powder has dissolved (about 1 minute).
  2. Beat butter in large bowl with an electric mixer for about 1 minute, then add confectioner's sugar. Add the espresso mixture to the frosting a little at a time as you beat it. If it is too dry, add 1 tablespoon of water at a time until desired buttercream consistency is achieved.
Assembly
  1. Using a spoon, cut out a small hole from the top of each cupcake. In the hole of the cupcake, layer approximately 1/2 teaspoon of soaking liquid, 1/2 tablespoon of raspberry sauce, and piped frosting on top.
I didn't change much in the recipe itself. The only major substitutions I made were I replaced the oil the recipe originally called for with unsweetened applesauce. Replacing oil with applesauce is one of my favourite substitutions. Not only does it cut back on the fat in the recipe, but it also adds a lot of moisture. In fact, when I was baking these, I was worried I had under-baked them because they were so moist! (but the touch and toothpick tests came out clean!)

Another alteration I made was I cut back on the sugar in the cake, since there were a lot of sweet elements going into it. I also only made a half batch of the frosting for the same reason. If you are noticing a trend here, I don't like desserts that are tooth-achingly sweet! That's why I also decided to make these into mini cupcakes. Instead of making the 12 regular sized cupcakes it's supposed to, I was able to get over 24 mini cupcakes.

In the instructions, it says to use 1/2 teaspoon soaking liquid, and I would highly suggest you use all of it - if not more (I definitely had a lot leftover!) If you don’t, the espresso flavour doesn’t soak very far into the cupcake. Don’t get me wrong! The cupcakes still tastes fantastic, but it could be that much better! Also, make sure you dig out a good chunk of the cupcake so you get a nice explosion of raspberry in the middle.

Surprisingly, the recipe was easy to follow and I had no trouble putting the whole thing together. Obviously, it is a little time consuming; there are about a billion different components, so if you want to try the recipe make sure you have a good couple of hours! And as you can see from the pictures, my frosting turned out! I made that frosting myself (I swear I didn’t pick it up from the grocery store – cross my heart!) and it turned out beautifully! I was so proud.

Although these cupcakes were a huge success, I didn’t get the challenge I was looking for. I guess this week I will have to find an even tougher recipe. I’m thinking truffles… and not just any truffles, maybe maple bacon truffles? Should be interesting!


Saturday, July 2, 2011

Oh Canada!

What's more patriotic than a red and white dessert to celebrate our country's birthday? How about red and white, red velvet cupcake?

Now originally, I was going to reply with some witty retort about red velvet cakes being a Southern recipe (because I've always associated them with the south), but I was wrong! Eaton's (if you are too young to know what Eaton's is, it was a big Canadian retailer - wow I feel old!) apparently used to carry a red velvet cake in their stores. So turns out they really are a patriotic dessert; not just in color, but in history!

So to celebrate Canada's 144th year, I decided to spend the day outside by the pool with anyone who wanted to join me. I was going to provide the food and pool, in hopes of some company in return! Since I didn't have any ridiculous red and white hats or horns, I decided to show my love of Canada by making a red and white dessert. Immediately, red velvet cupcakes popped into my head so I ran with it.
 
The recipe I used was from a popular food blog I follow, called Smitten Kitchen. Here is the recipe, altered for making 12 cupcakes (plus a couple extra mini ones):

Red Velvet Cupcakes
  • 1 3/4 cups all-purpose flour
  • 1/4 cup unsweetened cocoa
  • 1 cups canola oil
  • 1 cup + 2 tbs granulated sugar
  • 1.5 large eggs
  • 1/4 tsp red gel food coloring dissolved in 3 tbsp of water (if you want a deeper red color, use 1/2 or 1 tsp)
  • 3/4 tsp vanilla
  • 1/2 cup + 2 tbs buttermilk
  • 1 tsp baking soda
  • 1 1/4 tsp white vinegar.
1. Preheat oven to 350 degrees. Line 12 muffin tins with paper liners.

2. Whisk flour and cocoa in a bowl.

3. Place oil and sugar in bowl of an electric mixer and beat at medium speed until well-blended. Beat in eggs one at a time. With machine on low, very slowly add red food coloring. (Take care: it may splash.) Add vanilla. Add flour mixture alternately with buttermilk in two batches. Scrape down bowl and beat just long enough to combine.

4. Place baking soda in a small dish, stir in vinegar and add to batter with machine running. Beat for 10 seconds.

5. Divide batter among pans and bake in preheated oven for 20-25 minutes.

Recently, I purchased a cupcake decorating set and in it came an injector/filling tip. With this tip I could squirt delicious fillings into my cupcakes so I decided to test it out! Unfortunately, I couldn't decide what kind of filling to use! I thought a fruit preserve would add a nice contrast of flavours, but that a chocolate ganache would compliment the cake nicely. How was I going to choose? Easy, I wasn't! I ended up filling half the cupcakes with raspberry jam using the injector tip, and putting chocolate ganache in the other half (I cored out a hole in the cake and poured in the ganache).

The raspberry jam was simply store bought, but this is the ganache recipe I used:

Chocolate Ganache Filling:
  • 1/2 cup semisweet milk chocolate
  • 1/4 cup heavy whipping cream
  • 4 ounces unsalted butter
  1. Melt the ingredients in a saucepan over low heat. Stir the mixture constantly until melted and smooth. Be careful not to burn. Remove from the heat to cool completely.
Now, I had to add a fair amount of extra chocolate to my ganache because I found it tasted too buttery (probably another 1/4-1/2 cup, and I added a bit of dark chocolate). That may be because I switched the chocolate to milk chocolate (I had some picky chocolate eaters coming over...); but really, I don't see any problem with adding more chocolate to a recipe!


Finally, I had to make a frosting and I decided to go with the classic cream cheese frosting. I used this recipe, provided by Smitten Kitchen with her red velvet cake recipe:

Cream Cheese Frosting
  • 4 ounces cream cheese, room temperature
  • 1/4 cup (1 stick) butter room temperature
  • 1.5 cups confectioner’s sugar, sifted
  • 1 tsp pure vanilla extract
  1. Place cream cheese and butter in a medium bowl. With a handheld electric mixer, beat until light and fluffy, about 2 minutes.
  2. Add sugar and vanilla. Beat, on low speed to combine. If too soft, chill until slightly stiff, about 10 minutes, before using.
As you'll come to learn in my baking adventures, frosting is the bane of my existence. No matter what I try, or the effort I put into it, my frosting always comes out wrong! And then I often have to go running to the grocery store to picking up a replacement! Well, needless to say, this frosting experience kept with the trend.

I don't know if it's because I halved the recipe, but the icing was like water! Ok, maybe that's a bit of an exaggeration, but it literally poured off my spoon. I tried chilling it at first (as the recipe said), but that didn't help. Then I tried adding more icing sugar, but then it started tasting too sweet. I couldn't even rely on my back up grocery store plan, because they were all closed for the holiday! So I had to work with what I had.

Originally I wanted to have a swirl of red and white frosting to continue with the patriotic theme, so I coloured half the frosting red (read pink) and left the other half white. As I strategically scooped the two frostings into the piping bag (hoping to have one on either side to get the dual-color effect), the white started pooling down to the bottom of my frosting bag! By the time I got the red frosting into the bag it was on top of the white! That was a little annoying! However, with a little clever manoeuvring on my part, I was able to work the red frosting down and pipe nice mounds of half-and-half frosting onto the cupcakes and everyone lived happily ever after.... Yeah right, I wish!

As I said frosting is my Achilles heel, so of course it wouldn't go so easily! As soon as I pulled my frosting bag out of the way, everything started to melt. The perfectly conical pile of frosting starting melting like the Wicked Witch of the West at a water park. Frosting was running down the sides of the cupcake and I knew it was a goner (at least it was a delicious goner). Accepting my frosting defeat, I decided to simply have small pools of red and white frosting on top of my cupcakes. Not what I was originally hoping for, but it was all I was going to get!
In the end, my cupcakes didn't look so pretty, but they did taste fantastic! This was actually my first time having red velvet cake and I was surprised at their fluffiness! My guests enjoyed both fillings, and said they looked "great!" (but they might have been saying that more for my pride!)

All in all, it was a fantastic Canada Day. Relaxing outside with friends, enjoying both good food and good company. And I think it provided an excellent opportunity to write my first real post for this blog. I think it highlights perfectly the fact that I'm far from perfect in the kitchen, but I have fun and I'm never going to stop doing what I love.