I was hoping I wouldn't have to write this post, or at least that it would
be another couple months before I'd have to. Unfortunately, that didn't happen.
So here I am today
to write about my
most recent "epic failure" in the kitchen. This isn't going to be
pretty.
This past week was a little atypical in terms of my baking. Instead of just
baking a treat and bringing it into work, I had planned a girls night. And this
time was a little different, because I offered to cook the entire dinner. I
love hosting dinners, and had planned a fabulous three course meal. On the menu
would be: homemade foccacia bread and roasted red pepper hummus for starters, a
no-bake vegetable lasagna as an entree, and a mocha cake to finish off the
night. I wanted a lighter menu since I was serving three courses, so I found
some healthier recipes that used fresh ingredients. I thought it would be
perfect!
In this perfect world I was going to test out all these recipes beforehand,
but of course that didn't work out! So as a sort of compromise, I decided to
pre-make a lot of the meal the day before, so if anything went wrong I would be
able to handle it without an audience. The night before I planned to make the
hummus, bread and cake. Then the day of the dinner I would just need to make
the lasagna and play hostess.
Since this is a baking blog, and because all the other recipes are available
online, I will just post the recipe for the mocha cake. It's from the Better
Homes and Gardens Cook Healthy Today cookbook and here it is:
 Mocha Cake
Makes 12 servings
3/4 cup sugar
1/2 cup water
1 tbsp instant coffee
3 oz. semisweet (or bittersweet) chocolate
2 egg yolks
1 tsp vanilla
1/2 cup unsweetened cocoa powder
1/3 cup all purpose flour
5 egg whites
any topping you'd like: whipped topping, icing sugar, fresh fruit
Directions
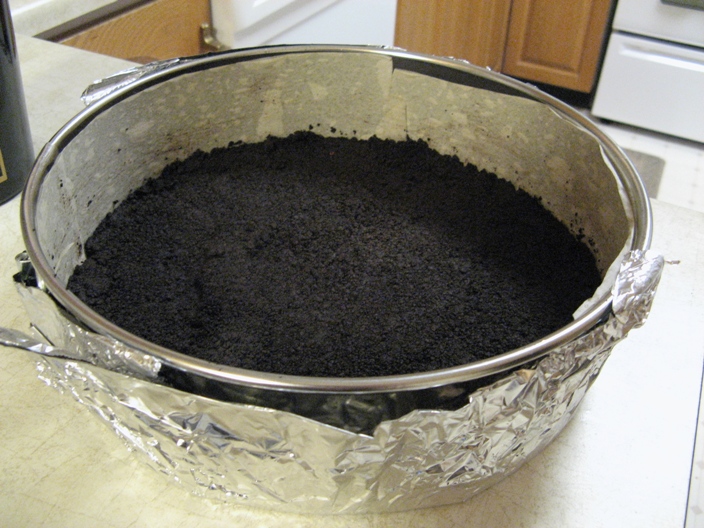
1. Line
the bottom of a 9-inch springform pan with parchment paper, and lightly coat the
inside of the pan with PAM (or another nonstick cooking spray). Preheat oven to
350 degrees.
2. In
a medium sauce pan dissolve sugar and espresso powder in water on medium-low
heat. Stir in the chocolate until melted and remove from heat.
3. Place
yolks in a bowl and gradually whisk the chocolate mixture into the eggs. Make
sure you pour the chocolate in slowly initially (while whisking the eggs
quickly) so you don't get scrambled eggs! Stir in vanilla.
4. In
another bowl sift together cocoa and flour. Stir the flour and cocoa into the
chocolate mixture until smooth.
5. In
a large bowl, beat the egg whites with an electric mixer until stiff peaks form
(the tips should stand straight). Stir a small amount of egg whites into the
chocolate mixture, then fold the chocolate mixture into the remaining egg
whites. Pour the batter into the prepared pan.
6. Bake
for 30 minutes or until the top springs back when lightly touched.

So I started off my prep day by making the bread. The recipe can be found on
the allrecipes website here:
http://allrecipes.com/recipe/michaels-foccacia-bread/detail.aspx.
Right out of the gate this is where it all started going downhill. The
recipe called for active dry yeast, and I thought that was what I had in my
cupboard, but apparently I thought wrong. For some mysterious reason, we only
had bread machine yeast. And let me tell you an interesting fact, we don't own
a bread machine. Anyways, I decided to use the yeast anyways, foolishly
thinking it would be ok, but it wasn't. Boy was it ever not ok! I have never
seen or tasted a more dense bread in my life. At various points in the recipe
you are supposed to let the dough rise, and if anything my compressed into a
tighter ball. So there was epic fail #1 - it went straight into the garbage.
I decided to make the cake next since baking's my thing. I could redeem
myself with this cake cause it seemed simple enough. And really, it was! It
came together with no problems and I put it in the oven to bake. I usually check
my desserts a couple minutes before the end of the suggested bake time (in case
my oven's too warm), so at 25 minutes I took the cake out. It looked and
smelled done, I touched the top of the cake and it sprang back like indicated -
so that was perfect! I set it out to cool, feeling accomplished, and went to
tackle the hummus next.
This recipe also seemed straightforward. It's from the allrecipes website as
well and you can find it here:
http://allrecipes.com/recipe/hummus-iii/detail.aspx.
All you do it put the
ingredients in a
food processor and blend. What can be so hard? Turns out nothing! I did change
the recipe slightly by adding about 1/3 cup of roasted red pepper, and it
turned out tasty! So I had two wins in my pocket and only one fail!

I decided to remake the bread, since it was bugging me that I didn't get it
right. So I went out, bought the right yeast and remade it. I guess the baking
gods were feeling sorry for me, because the bread turned out fantastic! I
sprinkled the top with a little parmesan, dried oregano and dried basil before
baking and it gave the bread nice flavour.
Feeling tremendously accomplished, I decided to pack everything up for the
night. This is where epic fail #2 reared it's ugly head. As I went to move the
cake from the cake pan to it's tupperware, the whole thing fell apart. It literally
melted in my hands. Turns out I didn't bake the cake long enough and it was a goopey
mess. Unfortunately it was past 10 o'clock and I didn't have the ingredients to
remake it, So I went to bed, feeling like I failed as a chef and baker. All I
wanted to do was order pizza for the girl's night and save myself the
humiliation.
I woke up the next morning determined to prove to myself that I am a good baker,
so I decided to remake the cake right after work. Thankfully, it turned out devine
and so did the whole dinner party that night! The lasagna was the easiest thing
to prepare and turned out delicious! The recipe is from Martha Stewart and I
followed it almost to a tee (I just added thinly sliced peppers to the
zucchini). Here is the recipe: ht
tp://www.marthastewart.com/334102/no-bake-summer-lasagna.
(Sorry the picture of the lasagna is so blue, I took it right in front of the
window and it threw the colours off)
Overall, despite the hiccups in the beginning, the dinner party was splendid
and went smoothly. I thought all the food was delicious and light, and I think
the ladies agreed with me. By the way, if you want a sinful dessert that is
only about 150 calories a slice, that cake is heaven. And I have never made such
a quick or more simple lasagna. Literally, in the time it takes you to cook the
noodles, you can cook all the vegetables. My whole reason behind writing this
post is to show you that no one (especially me) is perfect, even at the things
they are the most passionate about. Baking especially is a learning process and
you can't let epic failures get you down (at least not for too long!)


